Setting Up n8n in Queue Mode on EasyPanel - A Complete Walkthrough
tags: n8n, easypanel, workflow automation, redis, postgresql, queue mode, deployment
n8n is a powerful workflow automation tool that helps you connect different services and automate tasks. While a single n8n instance works great for small workloads, scaling to handle hundreds or thousands of workflow executions requires a different approach. That’s where queue mode comes in.
In this walkthrough, I’ll guide you through setting up n8n in queue mode on EasyPanel - a modern server control panel that makes deployment straightforward. By the end, you’ll have a production-ready n8n setup with separate worker and editor instances backed by Redis and PostgreSQL.
Understanding n8n Queue Mode
Before we dive into the setup, let’s understand what queue mode is and why you need it.
Standard n8n vs Queue Mode:
In standard mode, a single n8n instance handles everything - the web interface, workflow execution, and webhook processing. This works fine for light usage, but has limitations:
- All executions run on one server, limiting concurrency
- Heavy workflows can slow down the web interface
- Difficult to scale horizontally
- Single point of failure
Queue Mode Architecture:
Queue mode separates n8n into two types of instances:
- Editor (Main) - Handles the web interface, webhook reception, and queuing jobs
- Worker(s) - Execute workflows from the queue in the background
These instances communicate through Redis (for the queue) and share data through PostgreSQL (for workflow definitions and execution history).
Benefits:
- Scale workers independently based on load
- Web interface remains responsive even during heavy execution
- Better fault tolerance - if a worker crashes, others continue
- Horizontal scaling - add more workers as needed
Prerequisites
Before starting, you’ll need:
- An EasyPanel account with a server configured
- Basic understanding of environment variables
- About 15-20 minutes to complete the setup
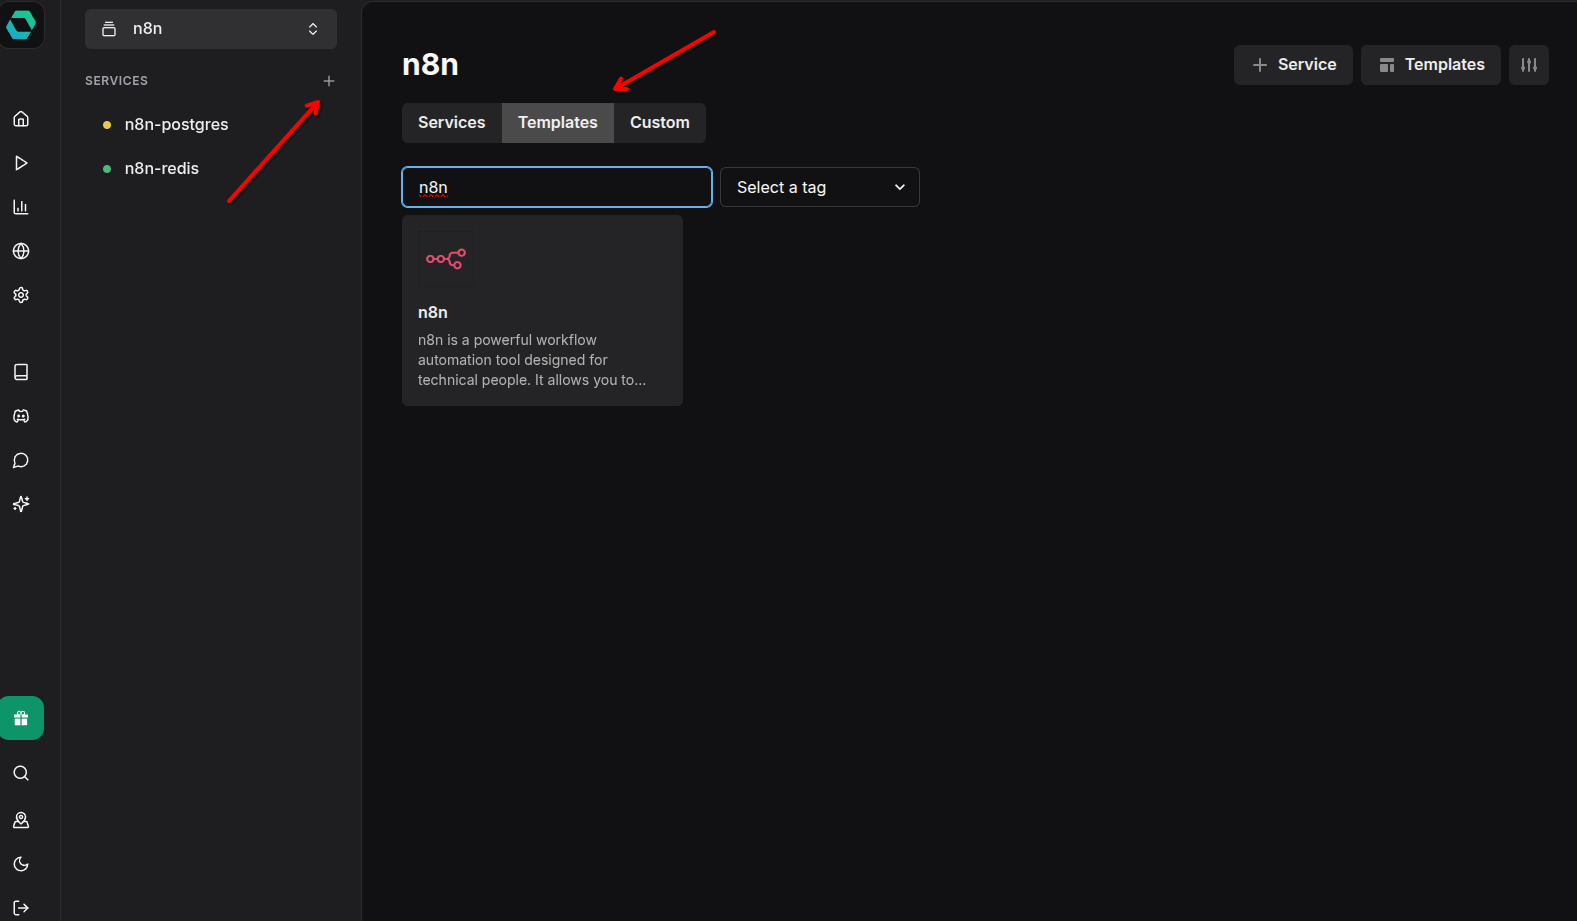
Step 1: Create a New Project
First, we need to create a project in EasyPanel that will contain all our services.\
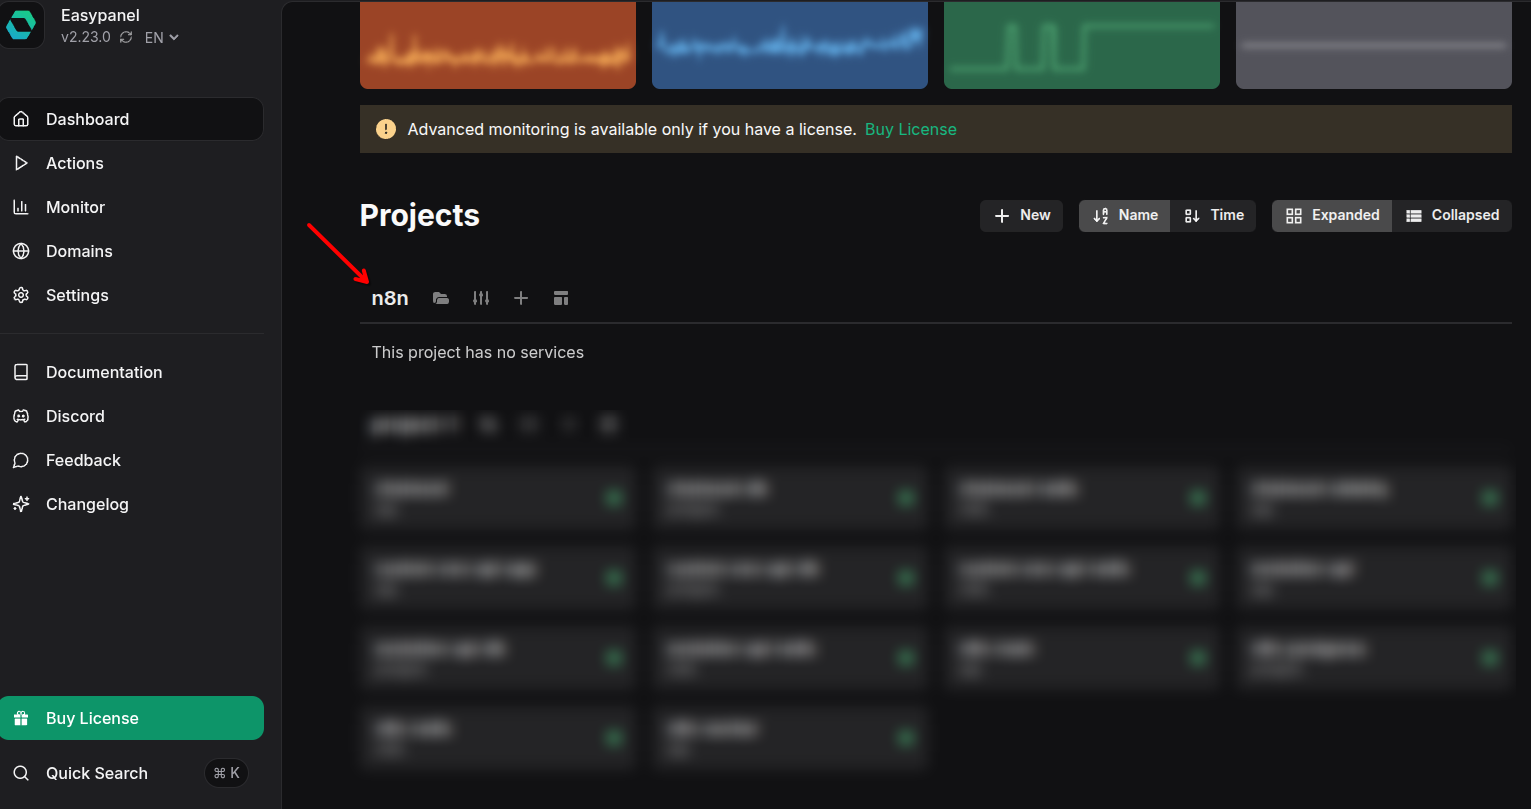
Click on “Create Project” in your EasyPanel dashboard. Give it a descriptive name like n8n or n8n-automation. This project will house all four services we’re about to create: Redis, PostgreSQL, n8n Worker, and n8n Editor.
Step 2: Set Up Redis
Redis will serve as our message queue, enabling communication between the editor and workers.
Initialize Redis Service
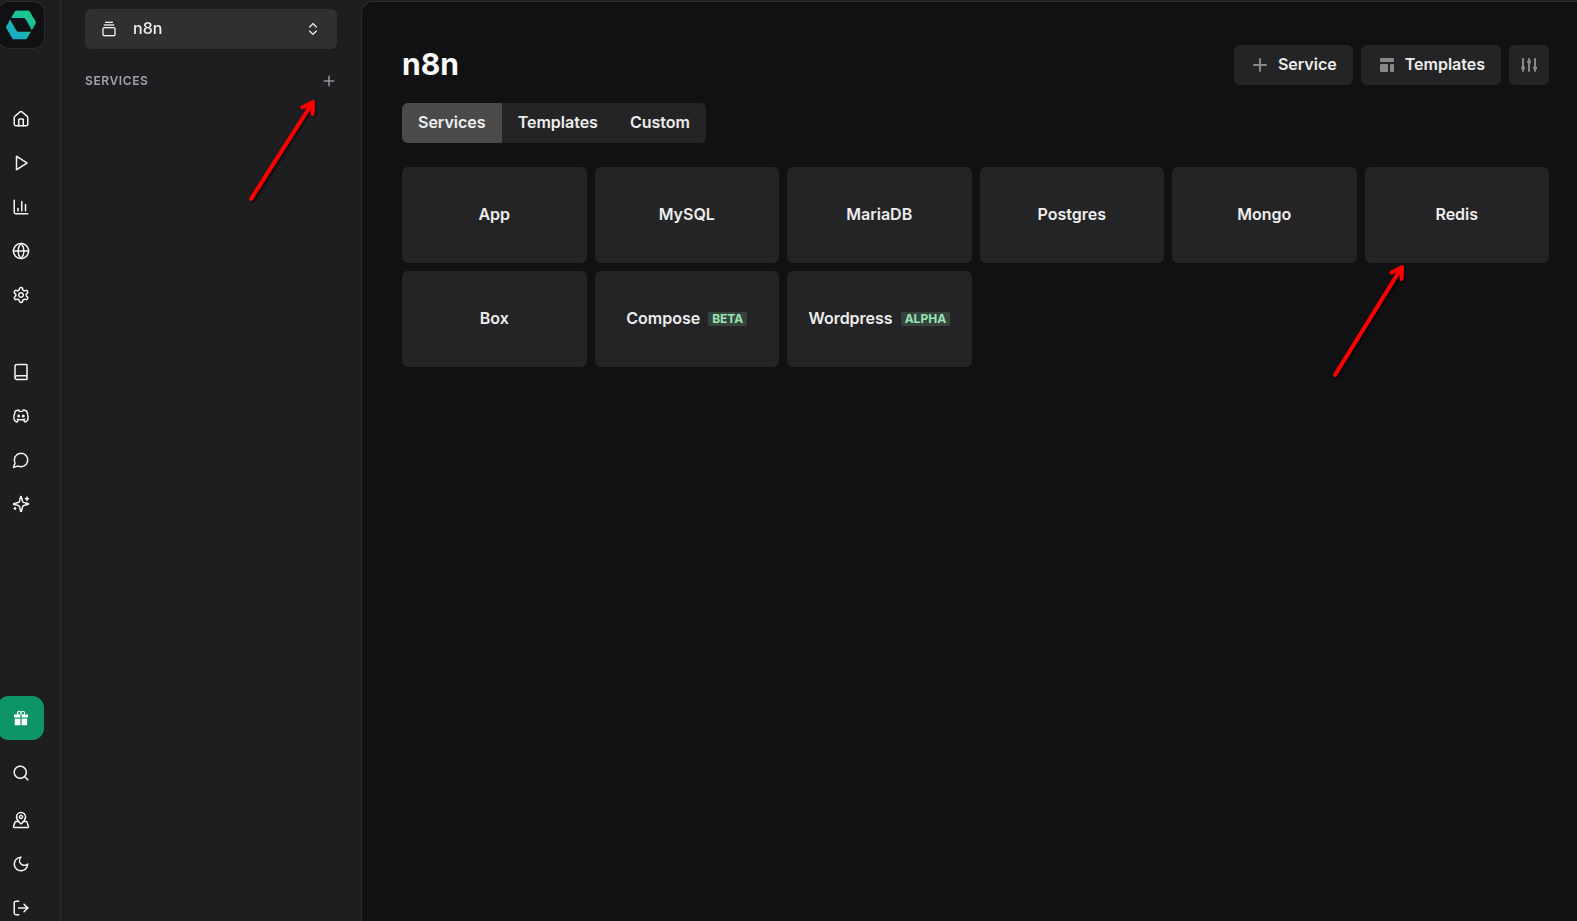
Inside your newly created project, click “Create Service” and select Redis from the available templates. EasyPanel provides pre-configured templates that handle most of the setup for you.
Configure Redis

Name your Redis service n8n-redis and deploy it with the default settings. Redis doesn’t require extensive configuration for n8n queue mode. EasyPanel will automatically:
- Generate a secure password
- Set up persistent storage
- Configure the Redis port (default 6379)
Once deployed, make note of the service name (n8n-redis) as you’ll need it for environment variables later. Keep this tab open as we’ll copy credentials shortly.
Step 3: Set Up PostgreSQL
PostgreSQL will store all workflow definitions, execution history, and credentials.
Initialize PostgreSQL Service
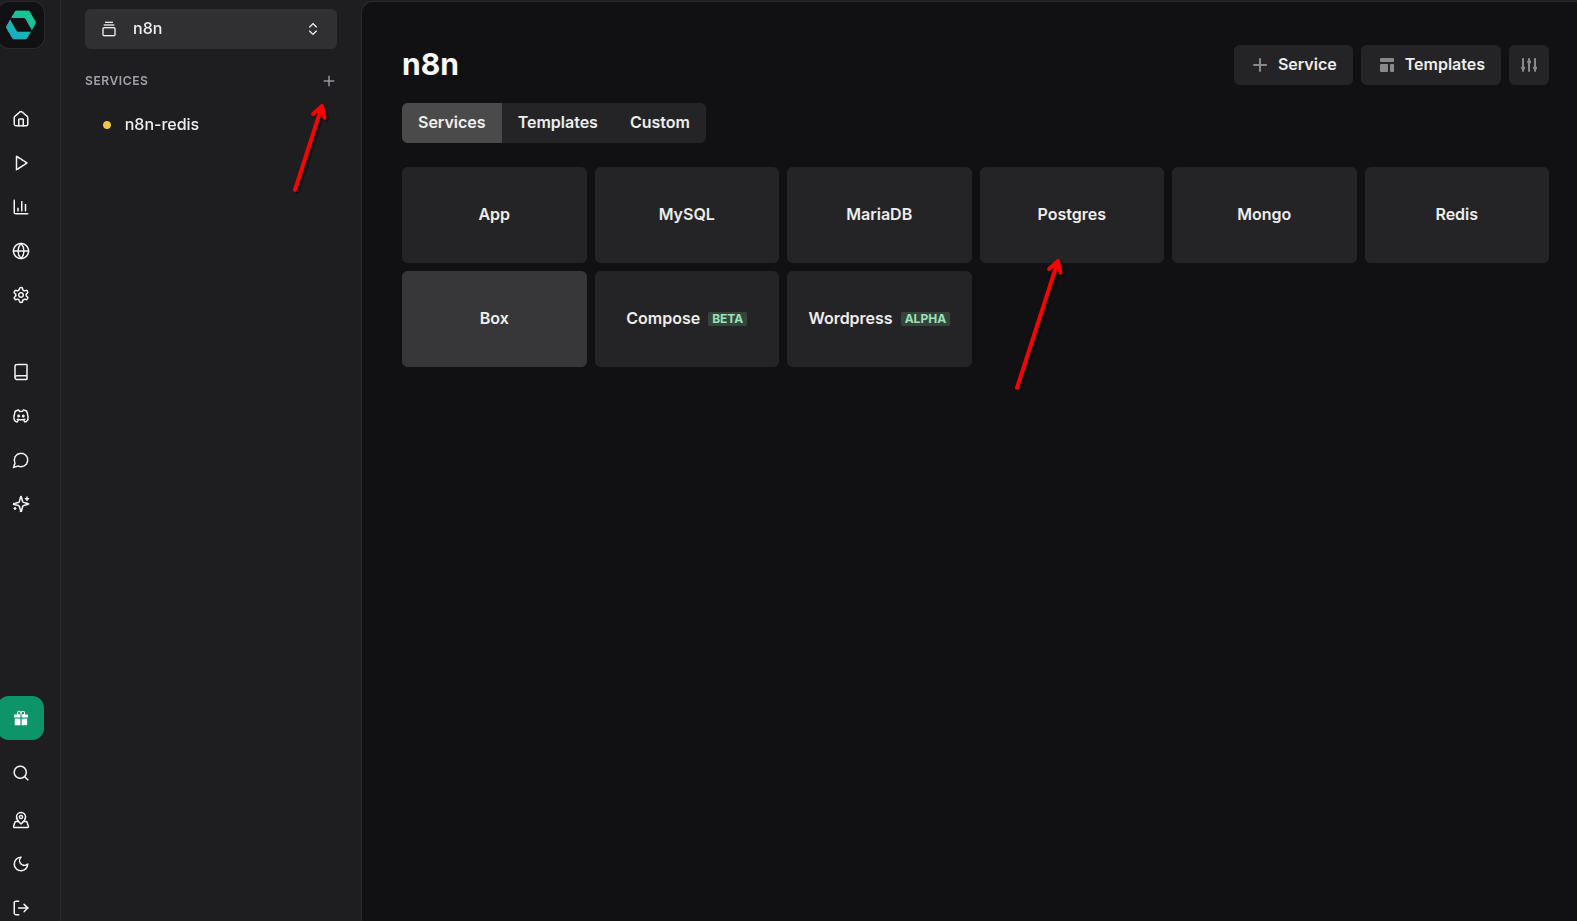
Create another service in your project and select PostgreSQL from the templates.
Configure PostgreSQL
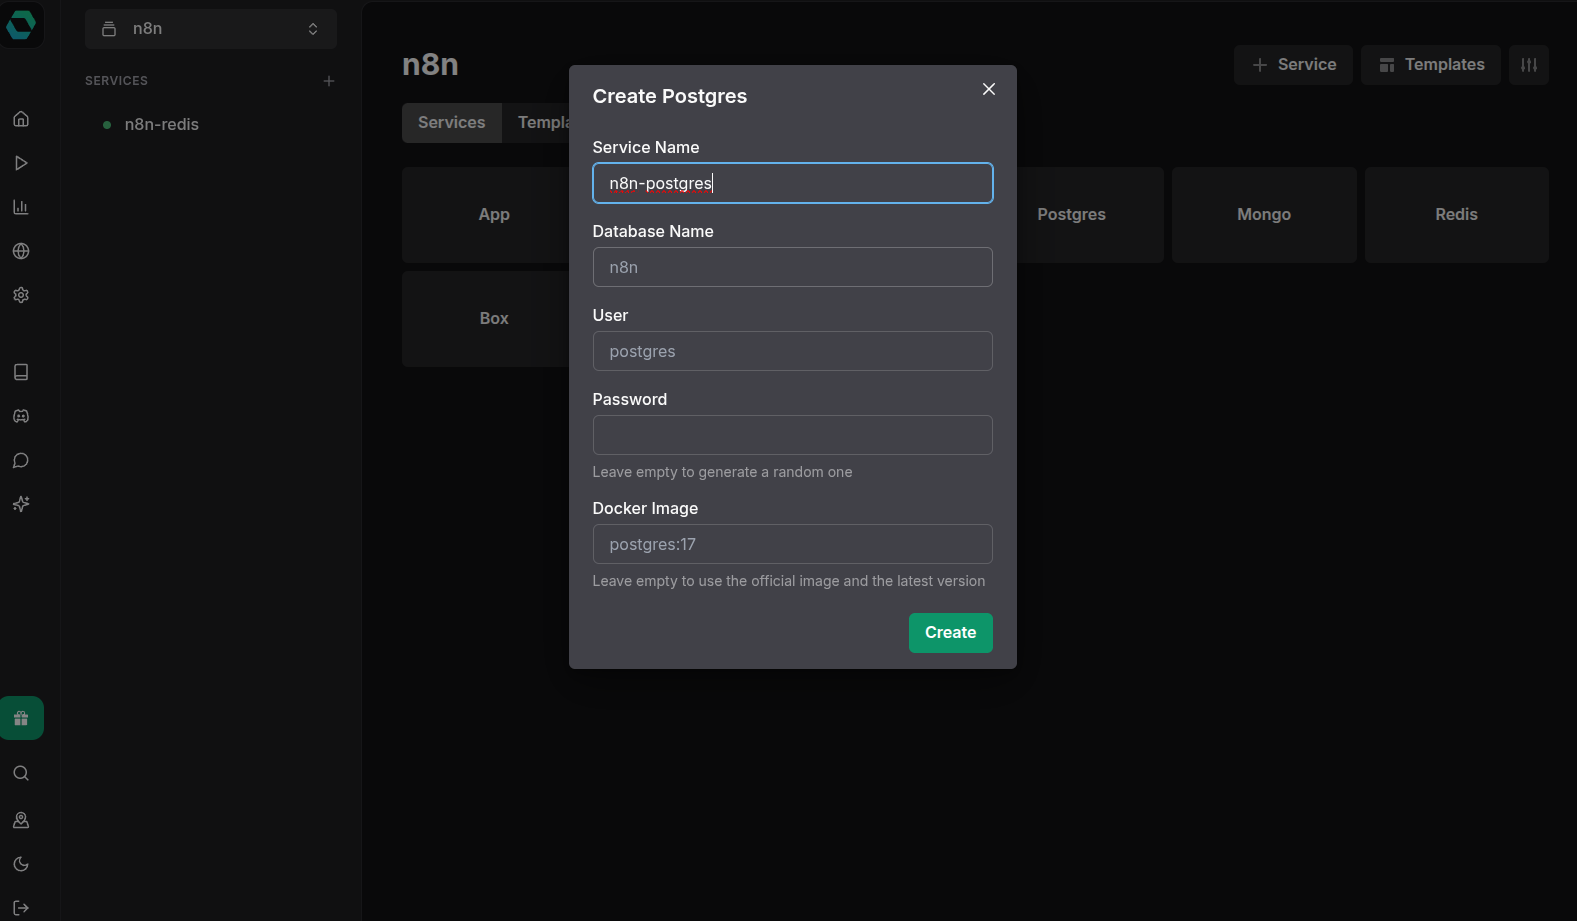
Name it n8n-postgres and proceed with deployment. EasyPanel will set up:
- PostgreSQL 15+ with secure default configuration
- A database named
n8n(or as configured) - Persistent volume for data storage
- Automatic backup configuration
Again, keep this tab accessible as we’ll need to copy the connection credentials.
Step 4: Copy Database Credentials
Before setting up n8n services, gather the credentials from Redis and PostgreSQL.
PostgreSQL Credentials
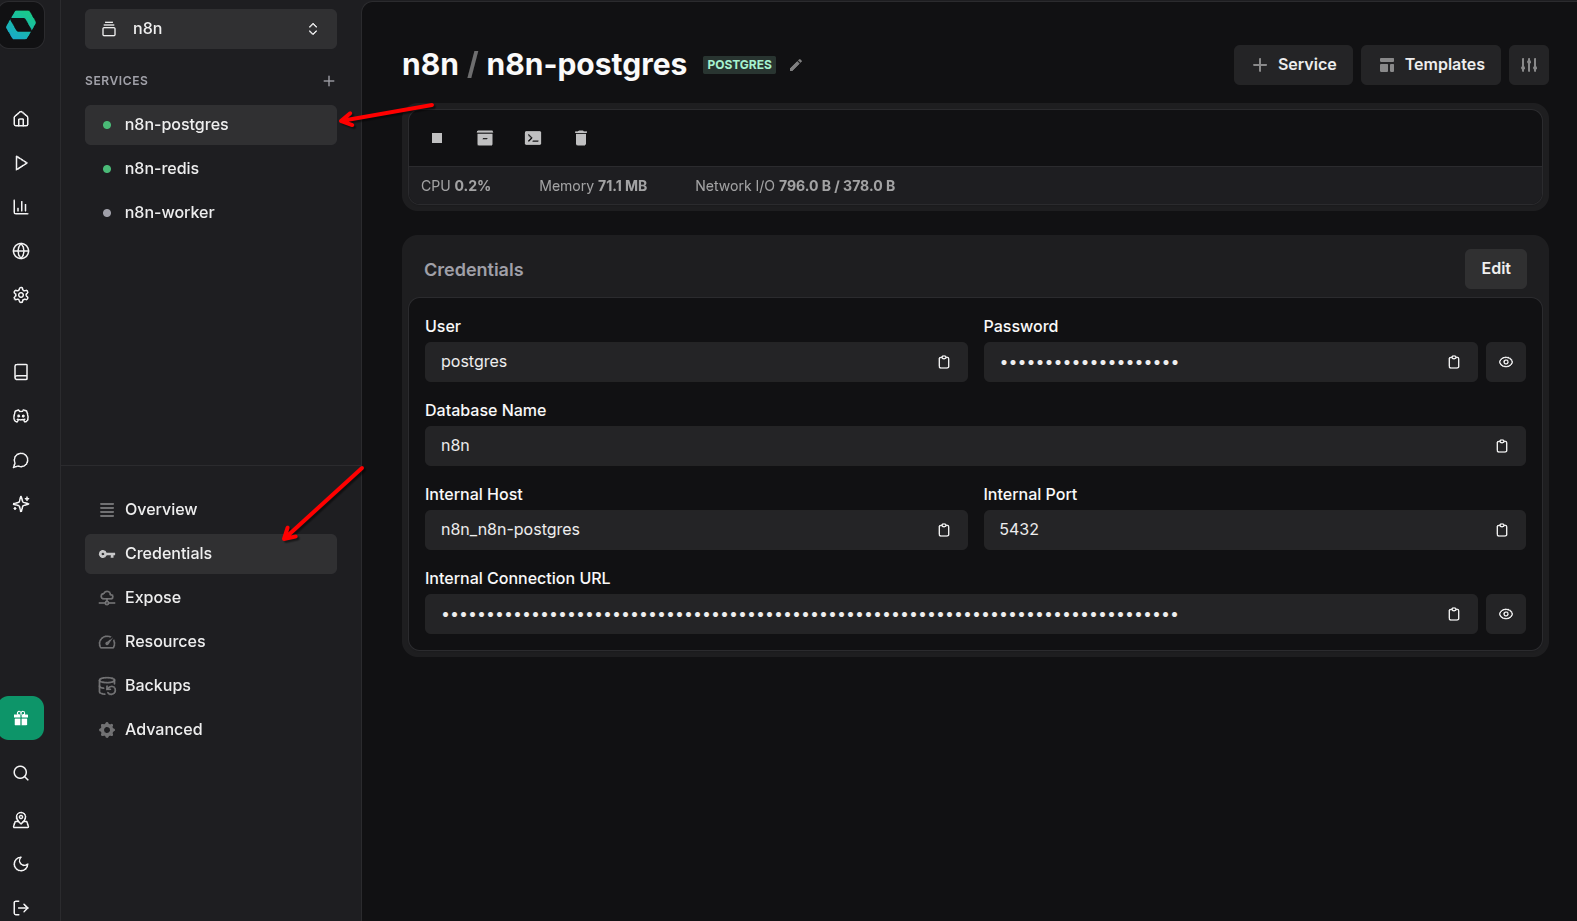
Navigate to your PostgreSQL service settings and copy the following:
- Host (usually
n8n_n8n-postgresin EasyPanel’s internal network) - Port (default
5432) - Database name (usually
n8n) - Username (usually
postgres) - Password (auto-generated secure password)
Redis Credentials
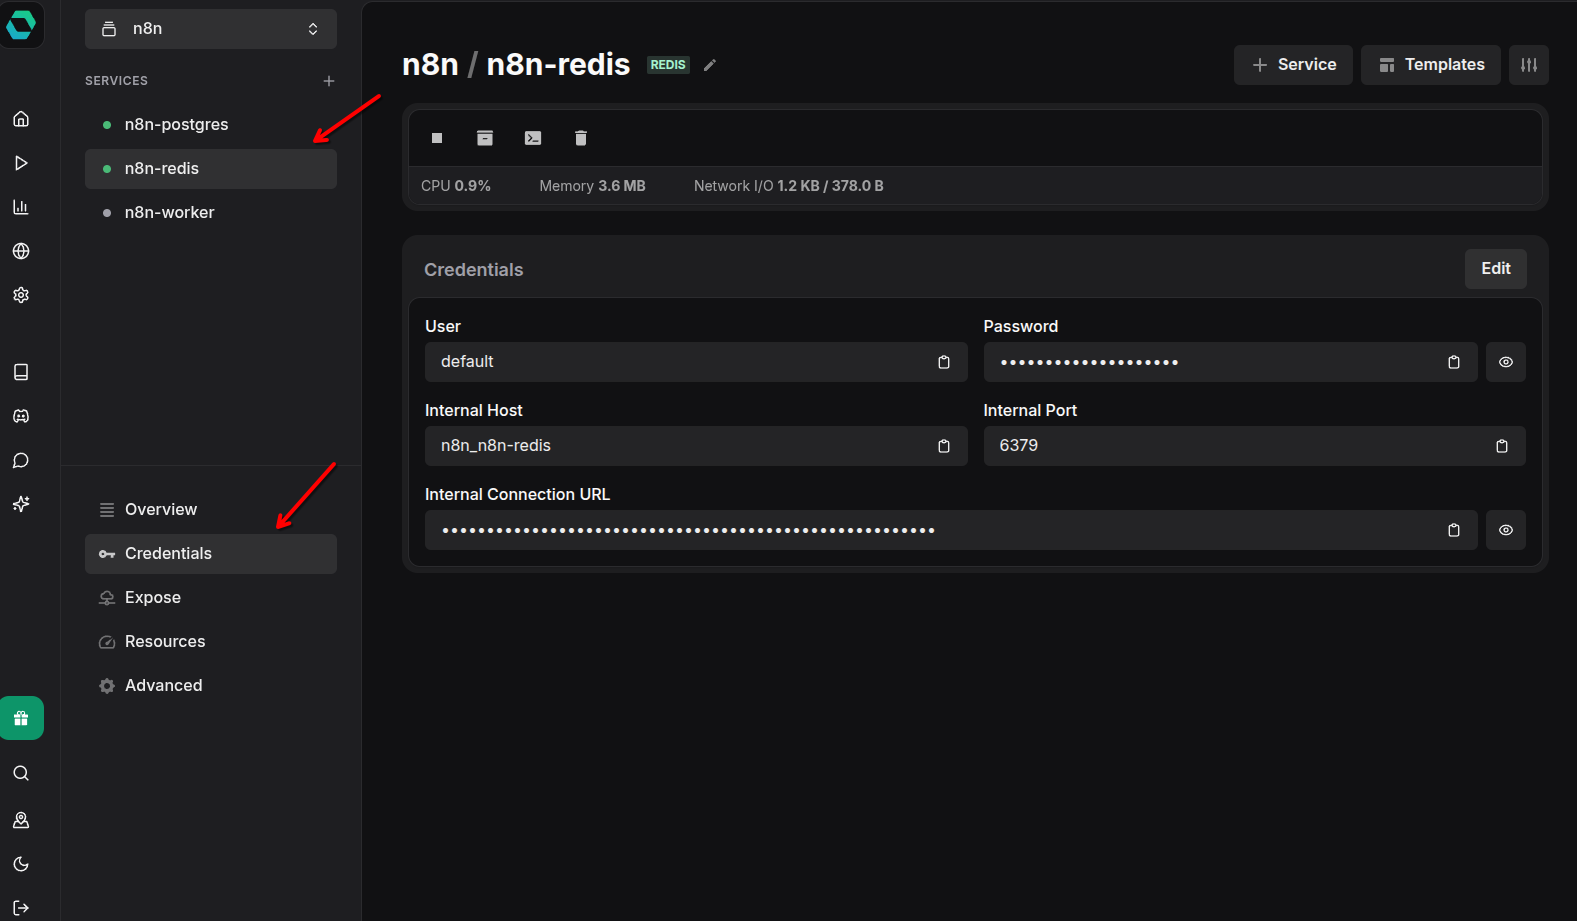
Navigate to your Redis service and copy:
- Host (usually
n8n_n8n-redis) - Port (default
6379) - Username (usually
default) - Password (auto-generated)
Step 5: Set Up n8n Worker
The worker instances execute workflows in the background. They don’t need web access and run with a special command.
Initialize n8n Worker Service
Create a new service and search for the n8n template. We’ll create the worker first.
Name the Worker
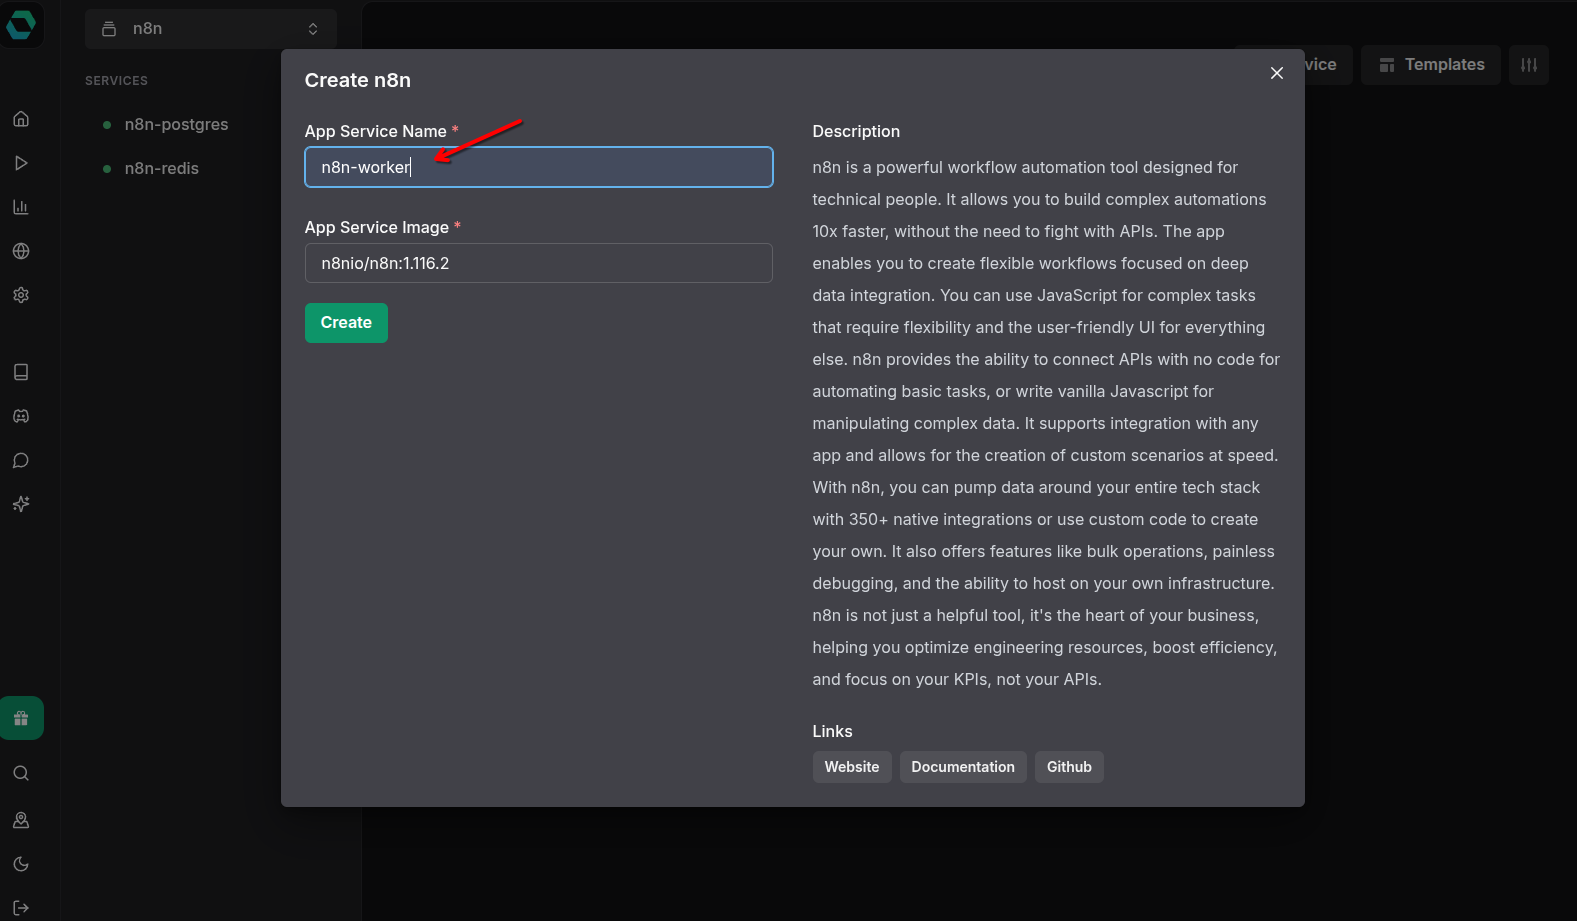
Name it n8n-worker to clearly distinguish it from the editor instance.
Configure Worker Environment Variables

This is the most critical step. The worker needs extensive configuration to connect to Redis, PostgreSQL, and operate in queue mode. Add the following environment variables:
# Core database configDB_TYPE=postgresdbDB_POSTGRESDB_HOST=n8n_n8n-postgresDB_POSTGRESDB_PORT=5432DB_POSTGRESDB_DATABASE=n8nDB_POSTGRESDB_USER=postgresDB_POSTGRESDB_PASSWORD=<<your-postgres-password>>
# Redis queue setupQUEUE_BULL_REDIS_HOST=n8n_n8n-redisQUEUE_BULL_REDIS_PORT=6379QUEUE_BULL_REDIS_USERNAME=defaultQUEUE_BULL_REDIS_PASSWORD=<<your-redis-password>>
# Encryption key (generate a random string, must be same for editor and worker)N8N_ENCRYPTION_KEY=<<your-secret-encryption-key>>
# Folder persistence (important)N8N_USER_FOLDER=/home/node/.n8n
# Enable queue modeEXECUTIONS_MODE=queue
Important Notes:
- Replace
<<your-postgres-password>>with the actual PostgreSQL password - Replace
<<your-redis-password>>with the actual Redis password - Generate a strong random string for
N8N_ENCRYPTION_KEY(you can useopenssl rand -hex 32) - Save the encryption key - you’ll need the exact same value for the editor
The internal hostnames follow EasyPanel’s convention: projectname_servicename. Adjust if you named your project or services differently.
Set Worker Command
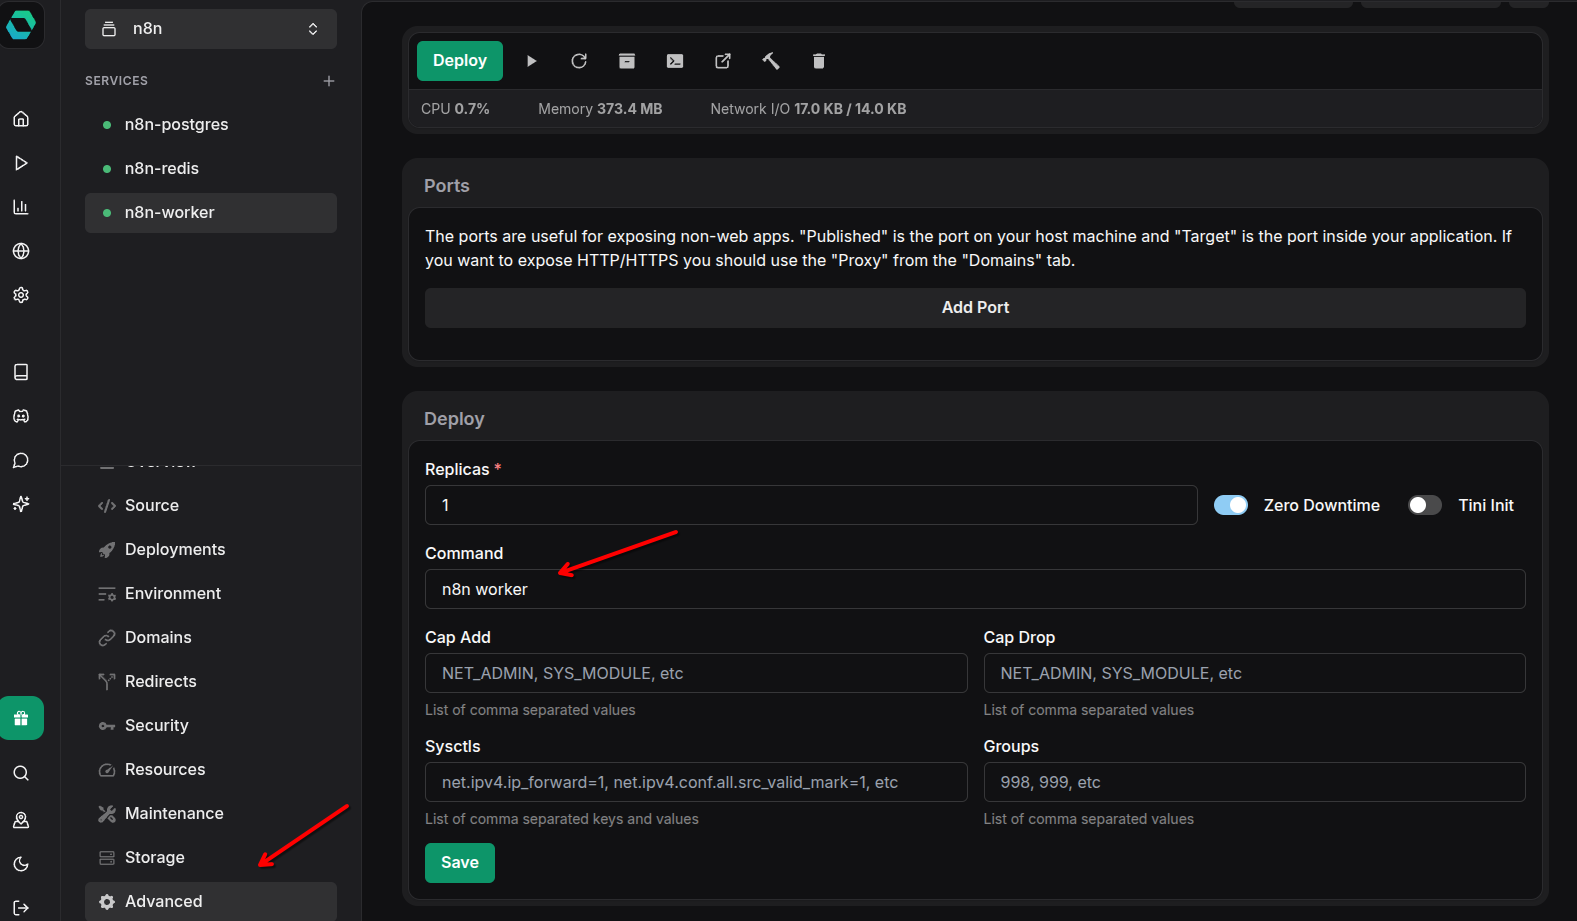
Workers don’t run the default n8n command. Instead, they need to run the worker command:
n8n workerSet this in the service configuration under the “Command” or “Startup Command” section. This tells n8n to start in worker mode, where it listens to the Redis queue for jobs instead of starting the web interface.
Remove Domain from Worker
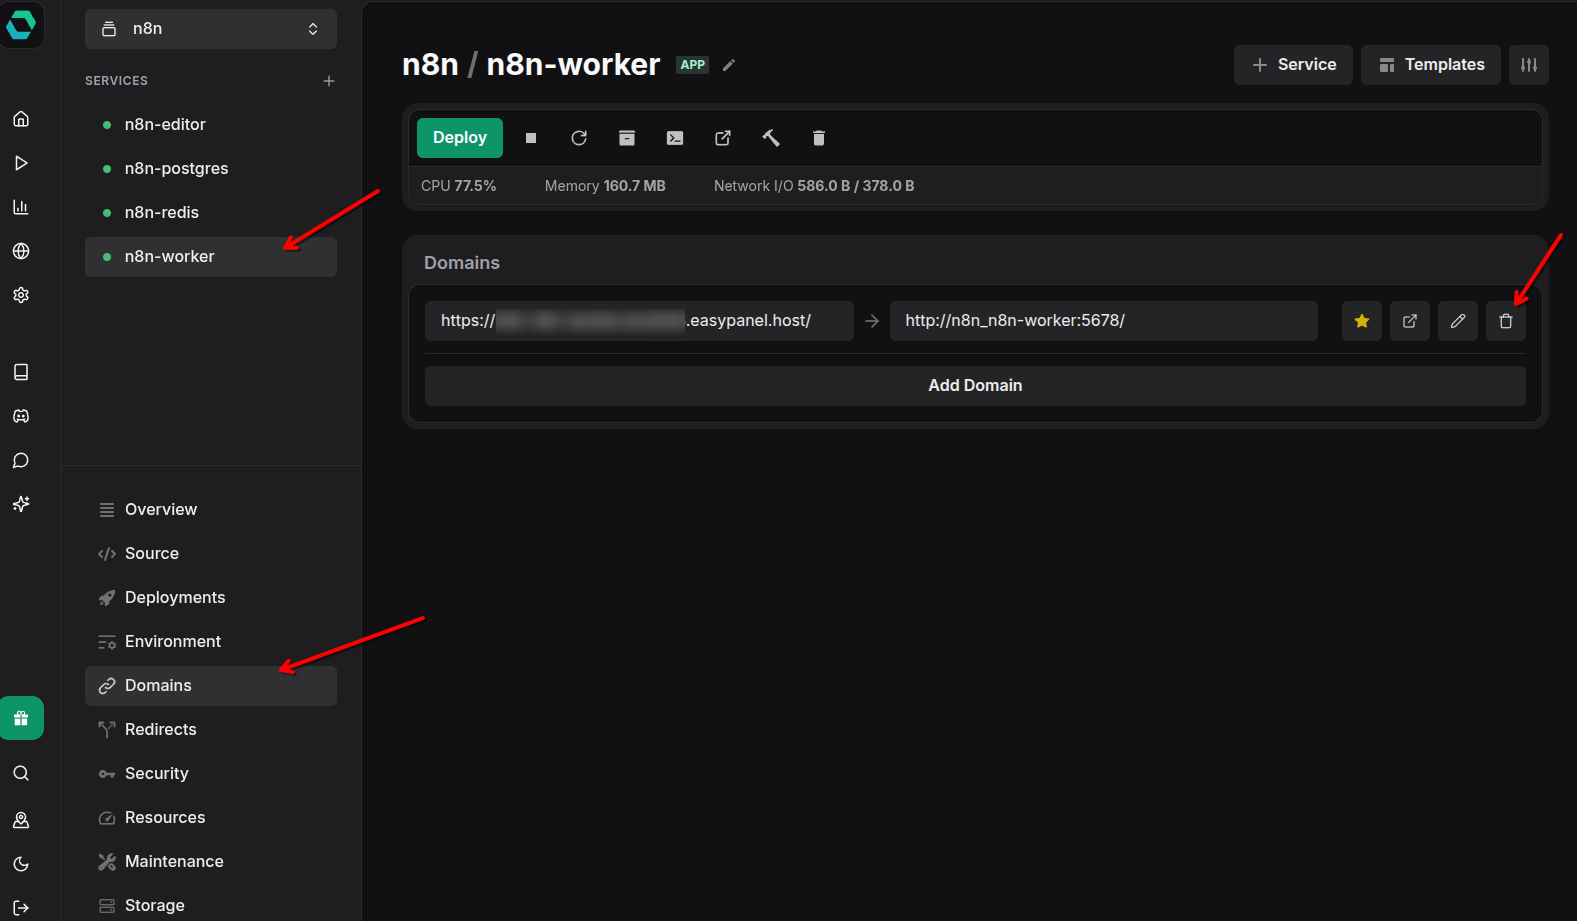
Workers don’t need web access - they operate entirely in the background. Remove any domain configuration from the worker service. This:
- Saves resources (no need for SSL/proxy setup)
- Improves security (workers aren’t exposed to the internet)
- Clarifies architecture (only the editor needs web access)
Step 6: Set Up n8n Editor
The editor instance provides the web interface and receives webhooks. It queues execution jobs for workers.
Initialize n8n Editor Service
Create another n8n service in your project.
Name the Editor
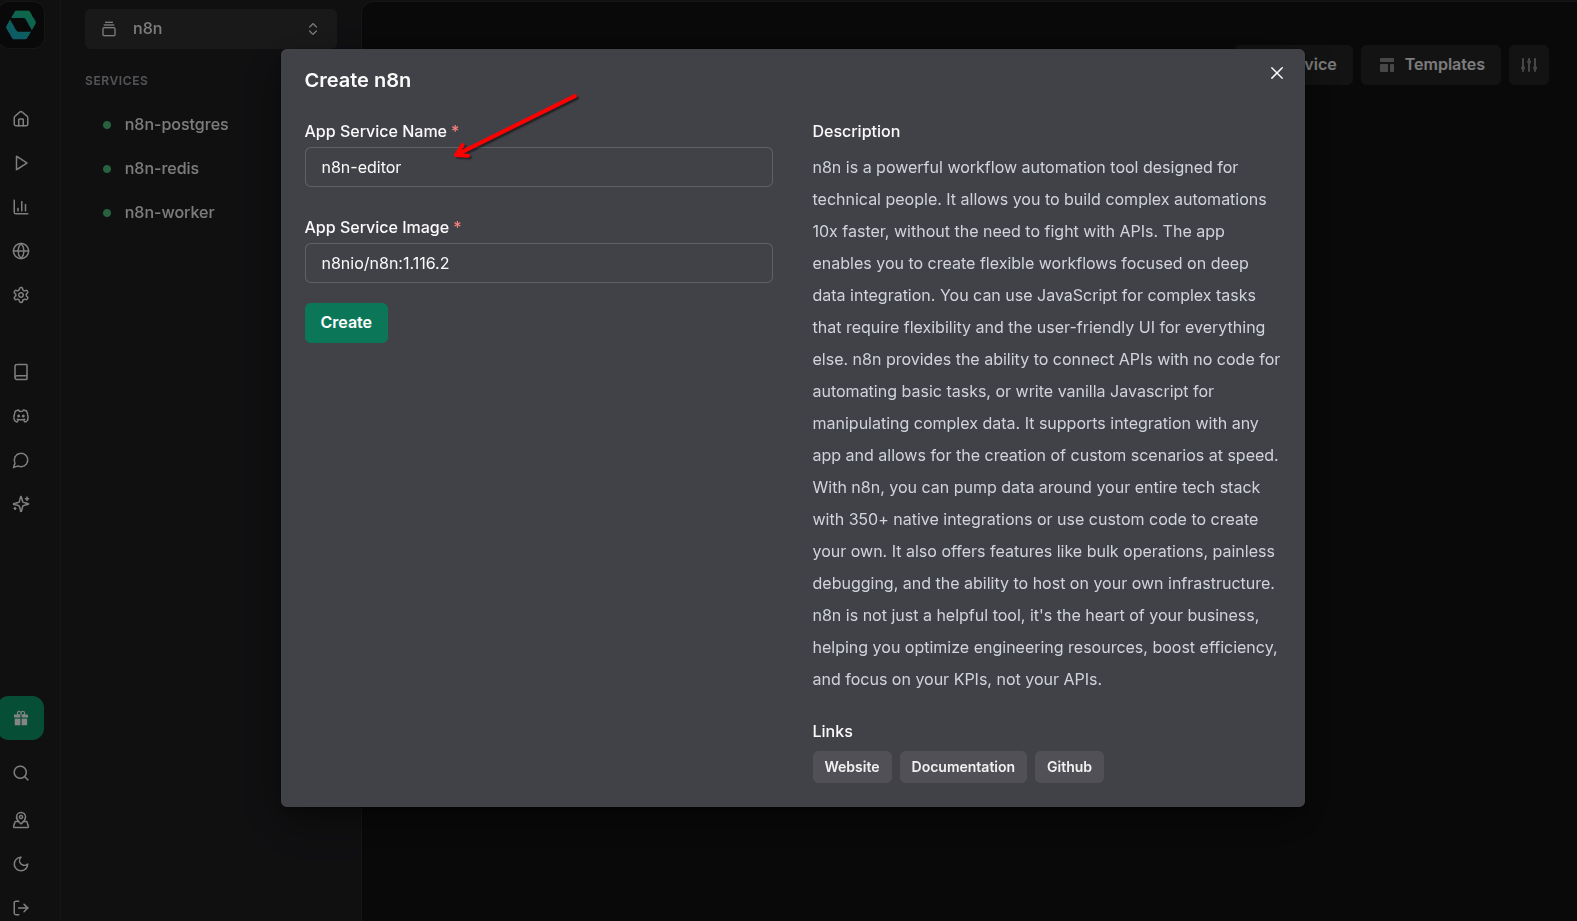
Name it n8n-editor or n8n-main to distinguish it from the worker.
Configure Editor Environment Variables
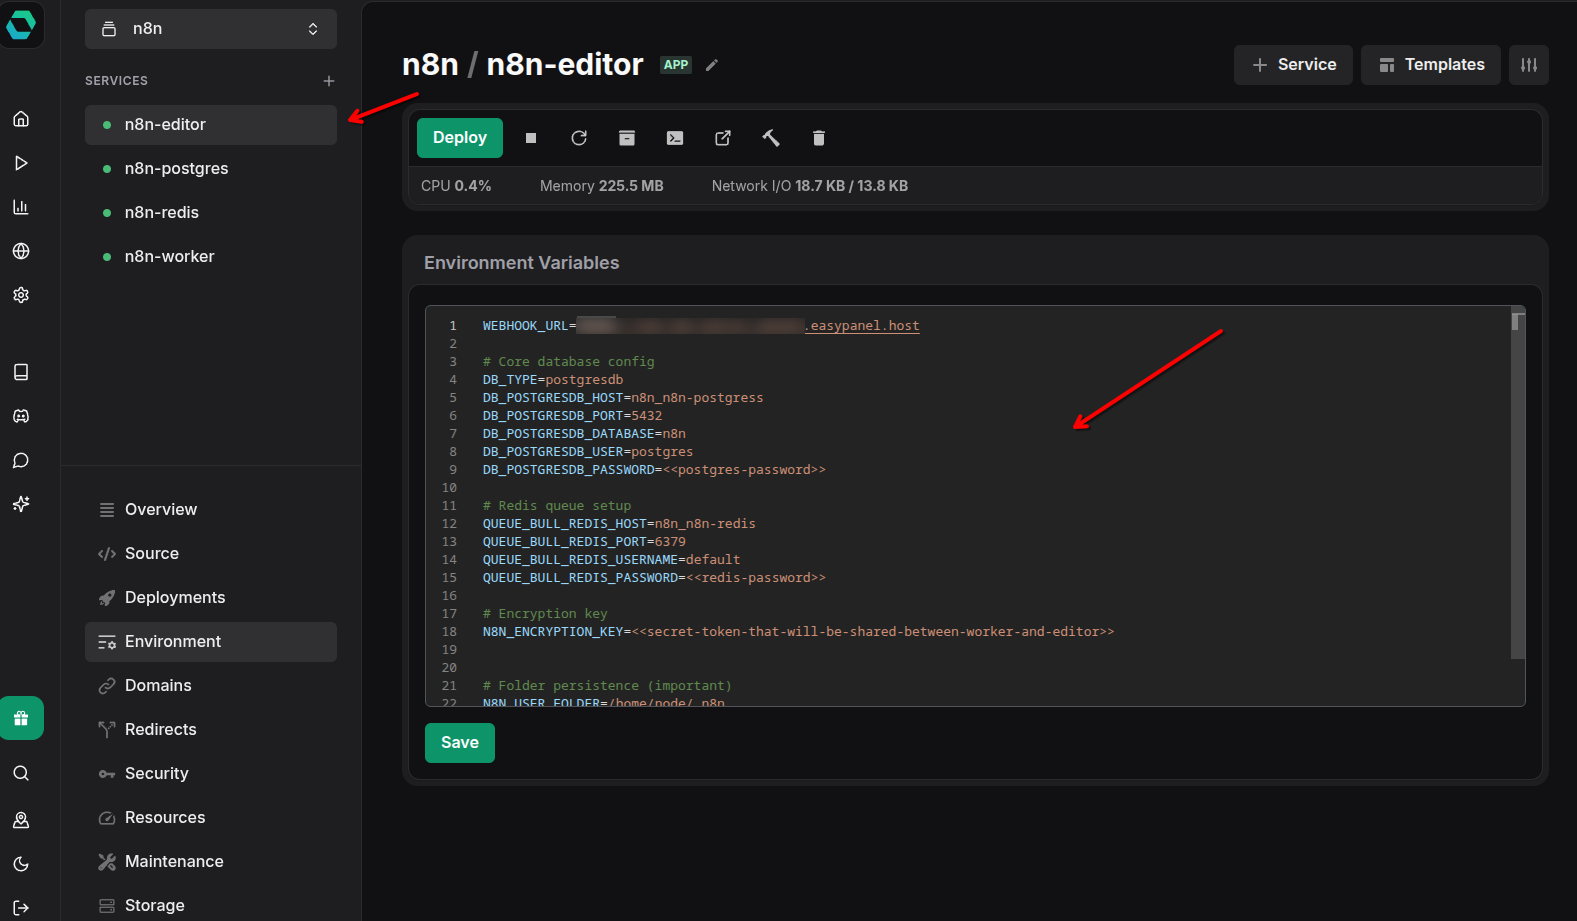
The editor needs similar configuration to the worker, plus webhook configuration:
# Webhook URL (your EasyPanel domain)WEBHOOK_URL=https://<<your-easypanel-domain>>.easypanel.host
# Core database config (same as worker)DB_TYPE=postgresdbDB_POSTGRESDB_HOST=n8n_n8n-postgresDB_POSTGRESDB_PORT=5432DB_POSTGRESDB_DATABASE=n8nDB_POSTGRESDB_USER=postgresDB_POSTGRESDB_PASSWORD=<<your-postgres-password>>
# Redis queue setup (same as worker)QUEUE_BULL_REDIS_HOST=n8n_n8n-redisQUEUE_BULL_REDIS_PORT=6379QUEUE_BULL_REDIS_USERNAME=defaultQUEUE_BULL_REDIS_PASSWORD=<<your-redis-password>>
# Encryption key (MUST be identical to worker)N8N_ENCRYPTION_KEY=<<same-encryption-key-as-worker>>
# Folder persistenceN8N_USER_FOLDER=/home/node/.n8n
# Enable queue modeEXECUTIONS_MODE=queue
Critical Configuration Points:
WEBHOOK_URLshould be your EasyPanel-provided domain or custom domainN8N_ENCRYPTION_KEYmust be identical to the worker’s encryption key- All database and Redis credentials must match the worker’s configuration
The editor uses the default n8n command (not n8n worker), so leave the command field empty or at default.
Step 7: Deploy and Access
With all services configured, it’s time to deploy and verify everything works.
Deployment Order:
- Ensure Redis and PostgreSQL are running
- Deploy the worker first
- Deploy the editor last
This order ensures dependencies are available when each service starts.
Access n8n Editor
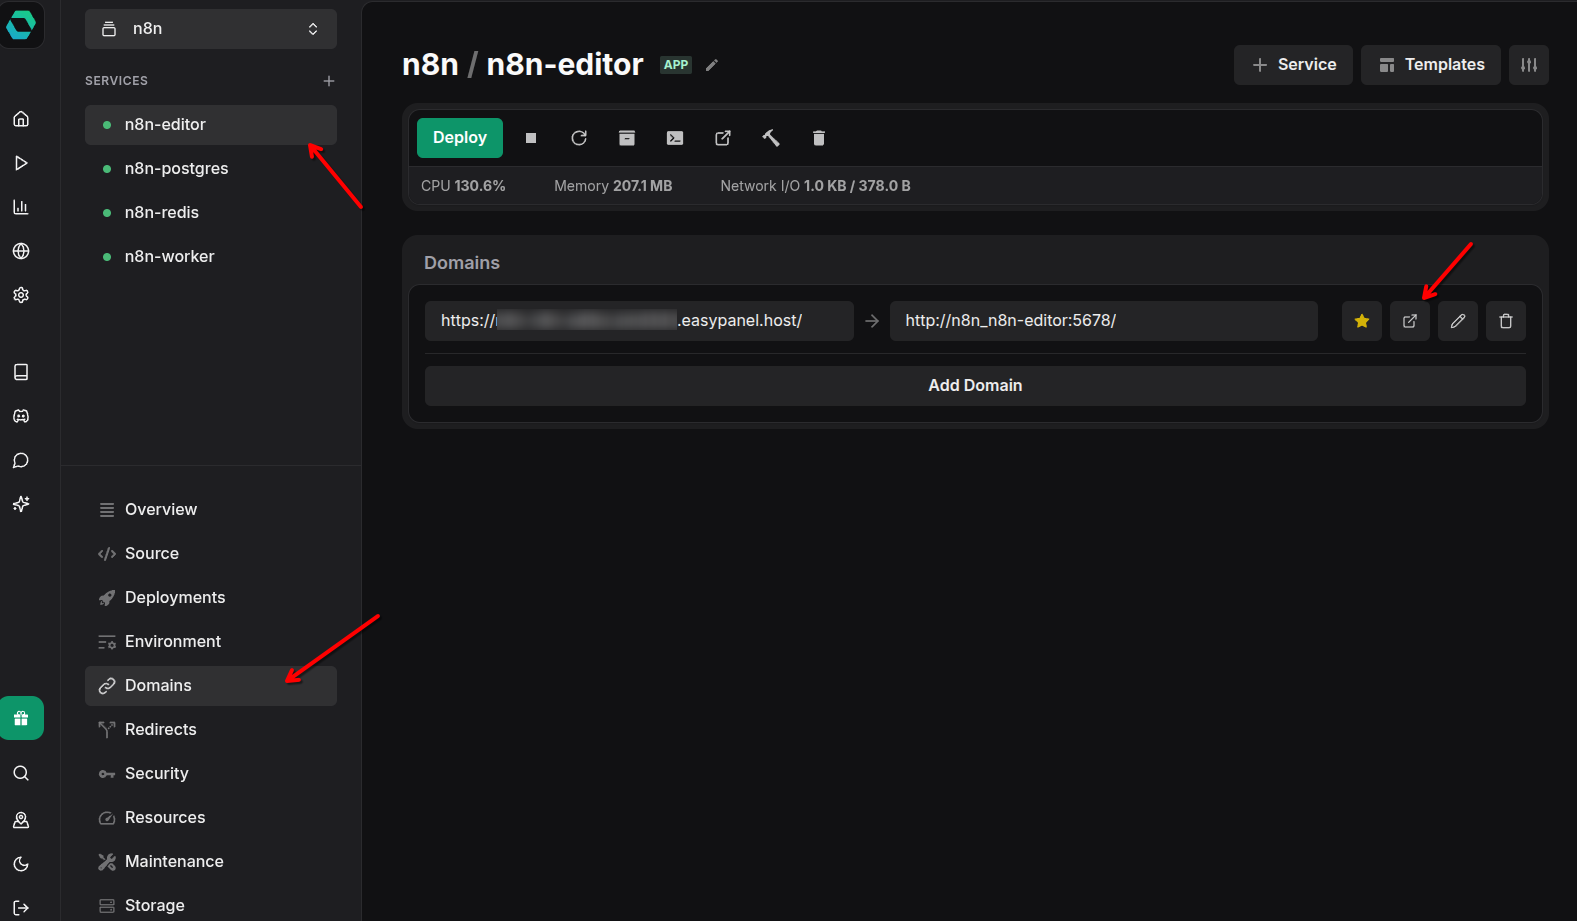
Once the editor is deployed and healthy, click on the domain link in EasyPanel. You should see the n8n setup screen where you can:
- Create your owner account
- Set up your workspace
- Start building workflows
Initial Setup:
On first access, n8n will ask you to create an owner account. This is the admin account with full access to:
- All workflows and credentials
- User management (if using n8n Pro/Enterprise)
- System settings
- Execution logs
Verification and Testing
After setup, verify everything is working correctly.
Check Service Health
In EasyPanel, ensure all four services show as “Running”:
- ✅ n8n-redis
- ✅ n8n-postgres
- ✅ n8n-worker
- ✅ n8n-editor
Test Workflow Execution
Create a simple test workflow:
- Add a “Schedule” trigger (every 5 minutes)
- Add a “Set” node to create some test data
- Activate the workflow
Watch the execution logs - if the workflow runs and completes successfully, your queue mode is working. The editor queued the job, and a worker picked it up and executed it.
Monitor Worker Activity
You can check worker logs in EasyPanel to see execution activity:
- Look for messages like “Waiting for jobs…” (worker is idle)
- Execution start/complete messages
- Any error messages
Scaling Your Setup
One of queue mode’s biggest advantages is easy horizontal scaling.
Adding More Workers
To handle increased load:
- Clone your
n8n-workerservice in EasyPanel - Name it
n8n-worker-2(or use a sequential naming scheme) - Use the exact same environment variables
- Deploy
The new worker will automatically connect to the same Redis queue and start processing jobs. You can add as many workers as your server resources allow.
Monitoring Performance
Watch for these indicators that you need more workers:
- Execution queue length growing
- Workflows waiting longer before execution starts
- High CPU/memory usage on existing workers
n8n provides execution statistics in the web interface under Settings → Usage & Plan.
Troubleshooting Common Issues
Here are solutions to common setup problems:
Workers Not Picking Up Jobs
Symptoms: Workflows queue but never execute
Causes:
- Encryption key mismatch between editor and workers
- Redis connection issues
- Database connection problems
Solutions:
- Verify
N8N_ENCRYPTION_KEYis identical in editor and all workers - Check Redis credentials and connectivity
- Review worker logs for connection errors
Database Connection Errors
Symptoms: Services crash with database errors
Causes:
- Incorrect PostgreSQL credentials
- Database not ready when n8n starts
- Network connectivity issues
Solutions:
- Verify all database environment variables
- Ensure PostgreSQL is fully started before deploying n8n services
- Check internal network connectivity in EasyPanel
Webhook Not Receiving Data
Symptoms: Webhook workflows don’t trigger
Causes:
- Incorrect
WEBHOOK_URLconfiguration - Domain not properly configured
- SSL certificate issues
Solutions:
- Verify
WEBHOOK_URLmatches your actual domain exactly - Test webhook URL accessibility from external services
- Check SSL certificate status in EasyPanel
Production Considerations
Before using this setup in production, consider these best practices:
Backup Strategy
Your critical data is in PostgreSQL:
- Configure automated database backups in EasyPanel
- Test restore procedures
- Consider periodic exports of workflow definitions
Resource Allocation
Allocate resources based on your workload:
- Redis: Lightweight, 256-512MB RAM usually sufficient
- PostgreSQL: Grows with execution history, start with 1GB RAM
- Workers: Depends on workflow complexity, 512MB-2GB each
- Editor: Lighter than workers, 512MB-1GB
Security
- Use strong passwords for all services (EasyPanel generates these by default)
- Rotate the
N8N_ENCRYPTION_KEYperiodically (requires re-deploying all services) - Restrict access to PostgreSQL and Redis (EasyPanel’s internal networking handles this)
- Consider setting up additional authentication for n8n (LDAP, SAML, etc.)
Monitoring
Set up monitoring for:
- Service health (EasyPanel provides basic monitoring)
- Execution success/failure rates (in n8n interface)
- Queue length (via Redis monitoring tools)
- Resource usage (CPU, memory, disk)
Conclusion
You now have a production-ready n8n installation running in queue mode on EasyPanel. This architecture gives you:
- Scalability - add workers as your automation needs grow
- Reliability - workers can fail without affecting the web interface
- Performance - dedicated resources for execution vs. UI
- Flexibility - scale components independently
Key Takeaways:
- Queue mode separates concerns: editor handles UI, workers execute
- Redis enables the queue communication
- PostgreSQL stores all persistent data
- Encryption key must be identical across all n8n instances
- Workers don’t need web access (no domain required)
- Horizontal scaling is as simple as cloning worker services
Next Steps:
- Explore n8n’s 400+ integrations
- Build complex multi-step workflows
- Set up monitoring and alerting
- Consider n8n Cloud for managed hosting if self-hosting becomes too complex
With this setup, you’re ready to automate workflows at scale. Happy automating!